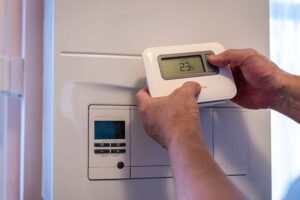


If one side of your house is always cold, it’s probably due to an uninsulated wall. Such cold walls not only make rooms feel chilly, but they also enable up to 35% of your home’s heat to escape. That results in increased energy bills, colder winter months, and additional stress on your heating system.
Internal wall insulation is also one of the most effective solutions to this problem, particularly in solid-wall homes or where external insulation isn’t feasible. It’s inexpensive (about £40–£50 per m²), lasts for 25 years, and even increases the value of your property.
Let’s see how you can insulate the cold wall of your home from the inside.
Why Insulate a Cold Wall from the Inside?
Cold wall insulation from the inside is often the most convenient option, especially for solid brick houses or where, in conservation areas, external alterations cannot be made.
- Reduces heat loss: Up to 35% of warmth is lost through non-insulated walls; insulating keeps your home warm in winter.
- Saves energy bills: Averages £140–£700 per year, reliant on the size of the property and the heating system.
- Reduces carbon footprint: Saves 410–2,100 kg of CO₂ every year.
- No need for external changes: Ideal for older homes, flats, or conservation areas where external changes cannot be made.
Either grappling with chilly walls, internal insulation is a smart, discreet, and cost-effective upgrade.
Internal Wall Insulation
Internal insulation of walls involves fitting insulating material to the inside face of external walls to conserve heat and warm up buildings and make them more comfortable. It is a convenient choice for solid-walled houses or buildings where external wall insulation is impossible due to planning restrictions.
There are two ways in which it is installed:
The rigid plasterboard is fitted directly onto the wall.
Metal stud or timber wall constructions filled in with insulation and finished off with plasterboard.
Once fixed, the wall is ready for decoration, wallpapered, painting, or finishing off with another cold wall finish.
Layers Most Frequently Used:
- Existing wall: Usually brick or stone, and used as the base of the structure
- Vapour control layer (VCL): Prevents moisture penetration into the wall, reducing the possibility of condensation
- Insulation layer: Natural insulation, foam boards, or mineral wool reduces heat loss
- Plasterboard/internal finish: Clean, smooth finish for decorating at the last minute
This insulation is best suited for older UK homes with non-cavity walls or listed properties where exterior alterations are prohibited. It will typically be cheaper to install and purchase than external wall insulation.
How to Tell If Your Home Has Solid Walls?
Before insulating, note down your type of wall. Pre-1920 houses have solid walls; cavity walls were used from the 1930s.
Easy checks:
- Age of property: Houses built before 1920 will likely have solid walls.
- Brick pattern: Alternating brick ends = solid wall.
- Thickness of wall: Less than 260mm usually means solid.
- Drill test: Have a professional check if in doubt.
Finding the right type of wall allows you to choose the right insulation method and avoid problems with moisture or heat loss.
Best Insulation Materials to Insulate a Cold Wall from the Inside
Some best insulation materials for insulating interior walls are listed below:
| Material | Pros | Cons | Best For |
|---|---|---|---|
| Rigid Foam Boards (PIR, EPS, XPS) | – Excellent thermal performance – Space-saving – Moisture-resistant | – Less soundproof than wool-based materials | Solid walls where space is limited; great as a wall covering for cold walls |
| Mineral Wool (e.g., Rockwool) | – Cost-effective – Excellent soundproofing – Fire-resistant | – Bulky – Can lose performance if damp | Stud walls in larger rooms or where fire safety and soundproofing are key |
| Fibreglass | – Affordable – Easy to handle – Fire-retardant | – Poor moisture resistance – May cause cold spots if poorly fitted | Budget-friendly projects or DIY internal partitions |
| Cellulose | – Eco-friendly – Good air sealing – Affordable | – Settles over time – Moisture-sensitive | Dry walls in eco-conscious homes |
| Spray Foam | – Very high insulation – Airtight and moisture-resistant – Fills odd shapes | – Expensive – Requires professional installation – Not for heritage walls | Homes needing airtightness or with irregular surfaces |
| Natural Materials (e.g., Cork, Sheep Wool) | – Sustainable – Breathable – Non-toxic | – Costly – Lower thermal performance in thin layers | Older/traditional homes need breathable insulation |
How to Insulate a Cold Wall from the Inside in Winter?
Internal wall insulation is one of the most effective ways to combat cold loss in winter, especially in solid wall homes. Below is a step-by-step guide on how to insulate cold outside walls safely and successfully.
1. Check Wall Condition
Start by testing the wall for dampness, cracks, or structural damage. Any damage must be cured before insulation. Insulation must never be fitted over a damp wall since it will only trap water and make the problem worse in the long term.
2. Understand the Dew Point Test
Dew point is where the air moisture condenses into water vapour. Should your inner surface of the wall go below it, condensation will be formed, yielding rot or mould. To help in avoiding this hazard, fit a vapour control layer (VCL) to the insulation system so the wall structure is kept dry of moisture.
3. Remove Fixtures and Fittings
Strip out everything that is fixed permanently onto the wall, such as:
- Radiators (drain before removal)
- Electrical outlets (turn off power first)
- Skirting boards, curtain poles, and shelving
- Mark and store safely to refit later
4. Locate & Repair Thermal Leaks
Weaker areas where heat loses itself readily, usually around:
- Windows and door surrounds
- Floor joints and ceiling edges
- Wall joints and pipework
Plug the gaps with insulation offcuts, flexible fillers, or tape to provide an unbroken thermal envelope.
5. Clear the Area
Shove furniture away from walls and strip off surface layers such as:
- Wallpaper
- Flaking paint
- Loose plaster
Clean the surface so that insulation boards or battens can stick well and do what they are meant to do.
6. Fit a Vapour Barrier
Install a continuous vapour barrier. (It is usually a foil-backed membrane or integral to the insulation board. Install it on the warm side of the insulation in order to stop moisture transfer from the inside air into the cold wall.
7. Fit the Insulation
According to your preferred method:
- For insulated plasterboard: Fix boards directly to the wall using adhesive (dot-and-dab) or mechanically fix onto battens.
- For stud wall structure: Construct a timber or metal stud frame, insulate with (e.g., mineral wool or PIR), and finish with plasterboard.
Always use the manufacturer’s recommendations for spacing, fixing, and sealing.
8. Insulate Cold Spots
Pay special attention to areas like window reveals, door surrounds, and junctions where cold bridging tends to occur. Use thin thickness insulation boards or insulating flexible tape to reduce heat loss in such areas.
9. Refit Skirting and Fixtures
Install skirting boards, sockets, and radiators once insulation and plasterboard have been installed. Extra long screws or spacers might be necessary to cover the added wall thickness.
10. Finish the Walls
Finish with jointing tape and filler, or use a plaster skim, to carry the wall to decoration level. You can finish with:
- Painting or papering
- Tiling (kitchen or bathroom)
Or secondary wall finish for cold walls, eg, insulating wallpaper for additional performance
11. Monitor for Moisture
Once in place, inspect the area from time to time for any indication of condensation or damp. A well-insulated wall should be dry and warm, but make sure the room is well-ventilated as well to prevent moisture accumulation.
12. Enjoy a Warmer Home
Once done, you’ll notice a marked improvement in room temperature, comfort, and energy efficiency.
Internal Wall Insulation Cost
Internal wall insulation costs can differ depending on the layout of your home, the condition of the walls, and the materials. A general price is to pay between £40–£50 per square metre for both materials and labour. Prices for more advanced systems, including stud wall insulation, can be as much as £100 per square metre.
Average Installation Cost (UK)
For the average 3-bedroom semi-detached property, complete internal wall insulation will cost about £7,500. These prices:
- Insulated plasterboard or studwork
- Vapour barriers and finishing materials
- Labour costs for expert installation
Additional Costs to Consider:
- Wall preparation and repairs: Cracks, holes, and damp spots need to be repaired in advance, usually for £100–£150, depending on the severity of the damage.
- Labour: Up to 60% of the overall cost can be covered by labour. £200–£300 per day is typically charged by installers, and more complicated work may take several days.
- Finishing: Don’t overlook plastering, painting, or wallpapering after the insulation is fitted.
Grants & Support Available
To assist in minimising out-of-pocket costs, homeowners can be eligible for government-funded schemes:
Great British Insulation Scheme
- Available in England, Wales, and Scotland
- Provides free or low-cost insulation
- Eligibility is determined by your EPC rating or Council Tax band
ECO4 Scheme (Energy Company Obligation)
- Targeted at low-income or fuel-poor households
- Financed by large energy suppliers
- Insulation measures, such as internal wall insulation, are provided at no expense to qualifying households
If you qualify, these schemes can substantially reduce your insulation costs or pay for them in full.
What Is the Cheapest Way to Insulate Internal Walls?
The cheapest way of insulating internal walls is thermal lining paper, insulated plasterboard, and loose-fill insulation. Thermal lining paper is the lowest priced at £8–£12 per m², best suited for moderate cold areas and simple DIY solutions. Insulated plasterboard provides enhanced performance for solid walls and is around £20–£35 per m².
For stud walls in properties, loose-fill insulation such as fibreglass or cellulose is £10–£15 per m². DIY can save on labour, but you won’t get Insulation grants such as ECO4 unless installed by a qualified installer.
Pros and Cons of Internal Wall Insulation
| Pros | Cons |
|---|---|
| Cost-effective: Up to 50% cheaper than external insulation | Disruption: Furniture must be moved; rooms may be temporarily unusable |
| Long-lasting: Can last 20–25 years with proper installation | Space loss: Around 100mm per wall; may affect small rooms |
| No external changes: Perfect for listed/conservation homes | Moisture risk: A Poor installation can lead to damp if no vapour layer |
| Energy efficient: Reduces heat loss, cuts heating bills | Fixture work: Radiators, sockets, skirting need removal/refit |
| Boosts property value: May raise EPC rating and value by 14% | Slightly less efficient: External insulation performs better in extreme cold |
| Breathable material options: Like cork or wood fibre |
Is It Worth Insulating a Cold Wall from the Inside?
Yes, insulating a cold wall from the inside is generally well worth it, particularly for older UK homes with solid walls or where outside insulation isn’t feasible.
It’s a sensible, cost-effective method of enhancing comfort, reducing heating bills, and increasing your home’s energy efficiency.
If installed properly with appropriate materials, problems such as damp or loss of space can be handled quite easily.
Moreover, with aid from programs such as the ECO4 or the Great British Insulation Scheme, you might be able to save or even eliminate the initial expense.
Frequently Asked Questions
It normally takes 2 to 5 days based on the number of walls, their condition, and the technique employed.
The cheapest options are thermal lining paper and insulated plasterboard. These are economical, simple to fit, and minimise labour costs.
Yes. Internal insulation is often employed in solid-wall houses where external insulation is not appropriate. It enhances thermal performance and, in some cases, soundproofing as well.
External wall insulation means attaching the outside wall with insulation boards and then rendering or cladding over them. It’s better as a whole, but more expensive in cost and might need planning permission.