Skip to content
Have you ever thought about replacing a radiator yourself? Seems impossible, but the good news is that you absolutely can. If your old radiator is acting up and you’re dreaming of a sleek new designer radiator? This guide has everything you need.
That being said, let’s dig deeper into the detailed guide on how you can replace your radiator through DIY methods. So, stick to this article as we dive deeper for you.
Why Replace Your Radiator?
Let’s talk about why you might need to replace your radiator in the first place. If your current one is slow to heat up, maybe it’s time for an upgrade.
A new radiator can cut your energy bills. It improves your home’s comfort. It gives your room a fresh new look.
Radiator Replacement Cost
The cost to replace a radiator varies a lot. It depends on your choices. A basic standard radiator might cost £50-150. A stunning designer radiator or column radiator could cost £200-800 or more.
The labour cost to fit a new radiator can cost more than the radiator itself. Professional installation typically runs £150-300 per radiator. That’s why learning how to replace a radiator yourself makes perfect sense. You’ll save money.
Everything You Need Before You Start
Let’s get you properly equipped for this DIY radiator project. You’ll need some basic tools and materials. Don’t worry – nothing too fancy.
Essential Tools
- Two adjustable spanners (trust me, you’ll need both)
- Radiator key or radiator bleed key
- Spirit level
- Tape measure
- Drill with bits
- Buckets and towels
- PTFE tape
Materials You’ll Need
- Your chosen radiator (more on choosing the right radiator later)
- Wall brackets
- Radiator valve (if replaced)
- Corrosion inhibitor
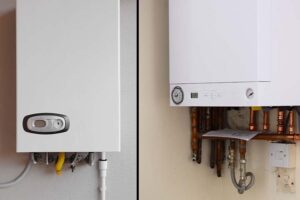
Choosing the Right Radiator
Before you can replace the radiator, you need to pick the perfect radiator for your space. What size radiator do you actually need? Here’s a simple rule. Measure your room length × width × height (in feet) × 4 = required BTUs.
Want a towel radiator for the bathroom? Maybe a stylish column radiator for the living room? The type of radiator you choose depends on your needs.
It depends on your style too. Just remember this important point. If your new radiator has different pipe centres than your old one, you’ll need a plumber. They’ll modify the existing pipework.
Step-by-Step: How to Replace a Radiator
Ready to get your hands dirty? Let’s walk through the process of replacing your radiator. We’ll take it step by step.
Step 1: Safety First – Turn Everything Off
Safety isn’t negotiable here. Turn off your central heating system completely. Wait 1-2 hours for everything to cool down. Nobody wants to deal with scalding hot water.
Step 2: Isolate the Radiator by Closing Both Valves
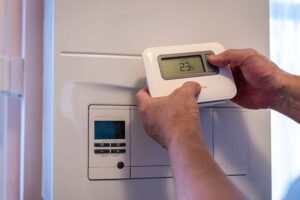
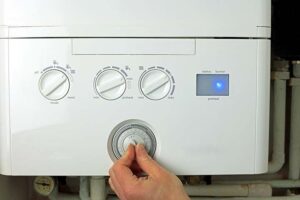
Time to isolate the radiator by closing both valves. Got a thermostatic radiator valve? Turn it clockwise to zero. For the lockshield valve, remove the plastic cap. Turn that square shaft clockwise. Count the number of turns – you’ll need this info later.
Step 3: Drain Your Old Radiator
Here’s where those buckets come in handy. Position towels around the radiator. Then open the bleed valve at the top of the radiator with your radiator key. This releases pressure. It lets water drain out.
Use your spanners to loosen the valve connections. Hold the valve body steady at the same time. Let all that water flow into your bucket. Yes, there’s usually more than you’d expect.
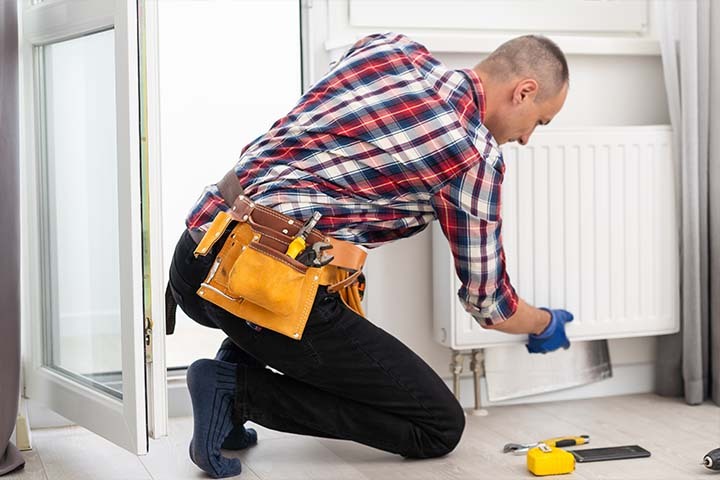
Step 4: Remove the Old Radiator
Once drained, disconnect both valve connections. You might need to gently push the heating pipes outward. This frees everything up.
Now, carefully lift the radiator upward and off the wall brackets. These things are heavier than they look. Grab a friend if needed.
Step 5: Install New Wall Brackets
Most new radiators come with their own brackets. So you’ll likely need to replace the existing ones with the new ones. Before drilling new holes, use a detector to check for pipes or wiring behind the wall. Nobody wants to drill into a water pipe.
Measure carefully and mark your wall according to your new radiator’s specifications. Drill pilot holes to secure those brackets firmly.
Step 6: Install the New Radiator
Apply PTFE tape to all threaded connections on your new radiator. Then hang it on the brackets. Make sure it’s level and properly seated. This is definitely a two-person job; one person can’t manage the weight and precision needed.
Step 7: Connect to Your Heating System
Connect the radiator to the valve and tighten everything securely, but don’t over-tighten. Remember the number of turns you counted earlier? Use that to return the lockshield valve to its original position.
Step 8: Test Everything
Turn on your central heating system and check for leaks around all connections. Use your radiator key to slowly open the bleed valve. Remove any air from the system. Listen for that satisfying hiss of air escaping.
When to Call a Plumber?
While replacing a radiator is definitely doable as a DIY project, some situations need professional help. If you’re moving pipes, that’s one situation.
Changing from a single radiator to a double is another. Dealing with complex valve work? It’s time to call in the experts.
The Bottom Line
There you have it. Everything you need to know about replacing a radiator. Whether you’ve chosen a sleek designer radiator, a practical towel radiator, or a classic column radiator, you now have the knowledge. You can tackle this project confidently.
Remember, the key to successful radiator replacement is taking your time. Follow safety protocols. Don’t be afraid to call a professional if things get complicated. With the right approach, you’ll have your new radiator installed and running efficiently in no time.
Frequently Asked Questions
Absolutely. Old radiators lose efficiency over time. They take longer to heat up. They struggle to maintain temperature. A new radiator heats faster and distributes warmth more evenly. You’ll notice the difference in your energy bills within the first few months. Plus, you’re avoiding those hefty plumber fees by doing it yourself!
Look, everyone’s nervous about this part! The good news? Most connection problems are fixable. If you get a small drip, turn off the system and check your PTFE tape application. Make sure you’ve wound it clockwise around the threads. Tighten connections gradually, never force them.
Smart question! Designer radiators look amazing, but they can blow your budget fast. Here’s a money-saving tip: shop around during sales periods. Check online retailers for last season’s models.
Cold spots that won’t go away even after bleeding? That’s internal corrosion. Rust stains on the floor beneath it? The radiator is deteriorating from the inside. Does it take forever to warm up compared to other radiators? It’s lost efficiency.